Preparing Apple Push Notification SSL Certificate
 Today I would like to describe (just not to forget) non-trivial process relating to implementation of Apple Push Notification Service mechanism delivers short messages to users’ devices applications in the AppStore. And I’d like to put actions sequence performed when creating and installing SSL Push Certificate: without this certificate server side is not able to send Push. Also, I’m going to write how to implement the most simple push-server php script. The function itself is very useful to alert users about new system events. Such monsters as Skype, Google, WhatsApp use push technology to make a call subscribers or notify about new messages in the manner of how it does standard iOS apps.
There are a number of scenarios of the push-technology in your project, I’m gonna focus on one that was implemented not so long ago in First Aid Project. Let’s assume we have some company app that has offices catalogs and promotional materials (stocks, news). The goal is to notify all subscribers of Push service on the opening of new offices and for new shares. What is the most optimal configuration here ? In my opinion, there should be a separate entity that implements a data model for Push on server-side architecture, an entity for storing push-tokens service subscribers, and the procedure for mailing, collecting all ready to be sent Push messages on the device subscribers. This procedure should be executing on the schedule, most of the time it will idle, but id doesn’t consume any serious system resources . So, what do we need?
I assume you have offical iOS Developer certificate, hopefully you’re quite sophisticated for this already since this article can not cover all this subject.
1. As always it’s necessary to have App ID to generate Push SSL certificate for. Open your App for view in your developer account.
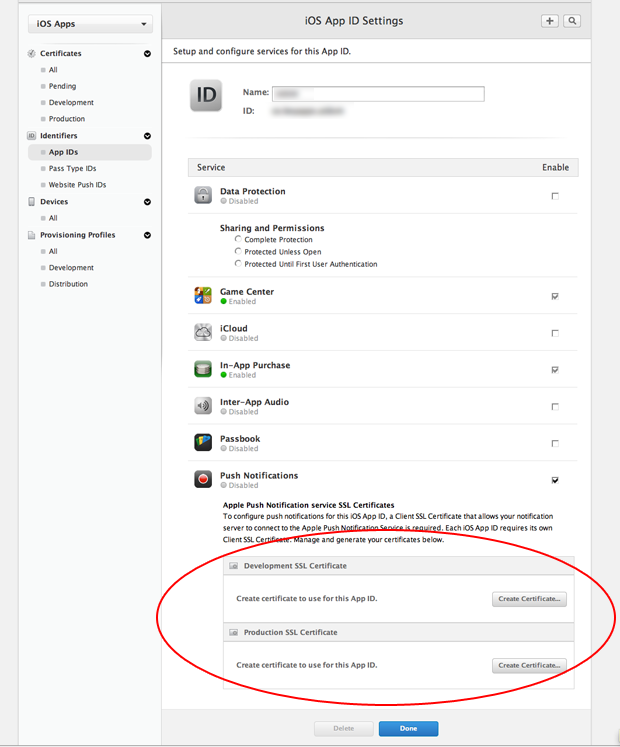
In the section Push Notification put the check if Push Notification for the application is Disabled. Now we see two frames with certificates: Development SSL Certificate and Production SSL Certificate. What’s the difference? Development certificate is used during the development, Productions after publication. Important note: You can only push test on a physical device – in the simulator this will not work.
2. Click Create Certificate first for Development SSL Certificate. Certificate for production workflow 100% similar. Get to the page “About creating a Certificate Signin Request (CSR)”, which provides a description of our future actions.
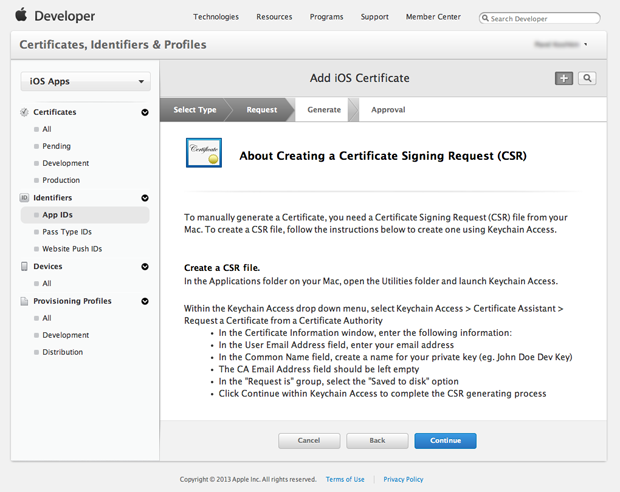
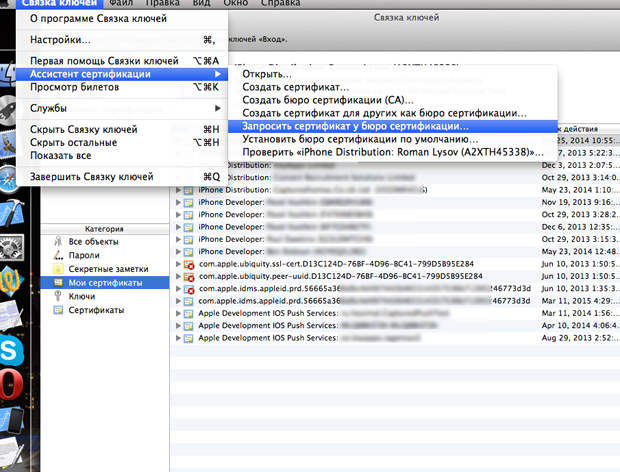
You need to create a certificate signing request. This can be done with the standard OS X application, which is called “Keychain”. Run it and go to the Keychain Access menu -> Certification Assistant -> Request a certificate from a certificate authority.
In next window choose the option “Save to Disk”, email user (there are often encouraged to provide email apple-account, but I’m not sure that this is critical), the name – this is the future name of your personal and public key encryption.
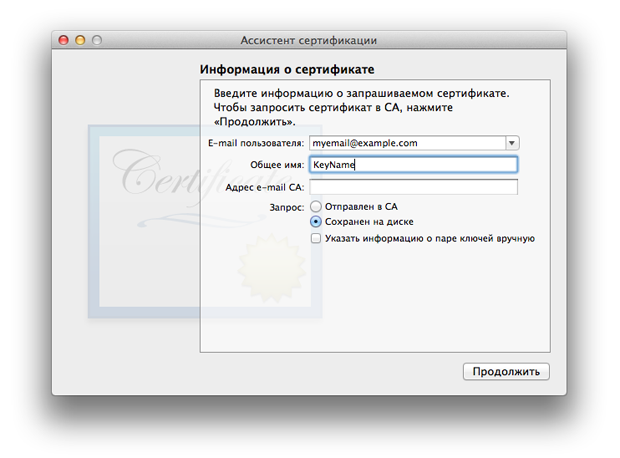
Then click Continue, choose a place on the disk where the file will be saved. Go back to the developer portal to the page “About creating a Certificate Signin Request (CSR)”, click Continue there. On next page, select your file and click Generate. After few seconds the system produces a link to download the generated certificate, which is what we do.
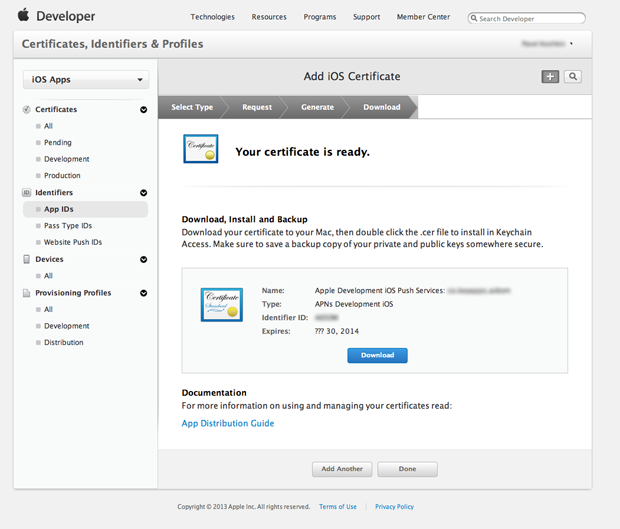
The system prompts you to save the certificate file named aps_development.cer. I recommend to create a separate folder to store all key/cert stuff. It’s not necessary to install this certificate to your OS X Keychain
3. Next, you need to upload the private key. Open Keychain Access, find your key, and select it from the menu, select File -> Export Object.

The system will ask for the key word – this is the password for access to the private key, so even if someone gets hold of the exported key, he will not be able to use it. Remember that phrase, which we denote as pass1.
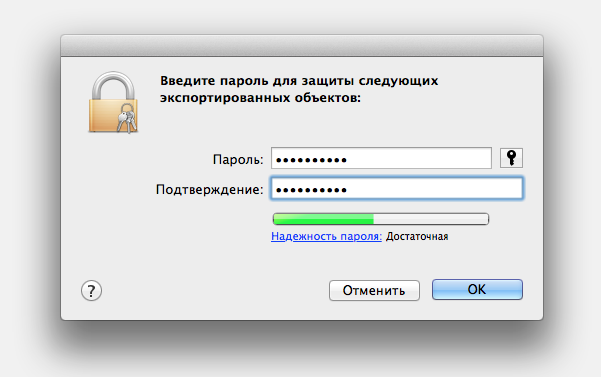
You are prompted to save the key in a file with the extension .p12 (let it be KeyName.p12). After choosing filename the system will ask to enter a password to a keychain.

4. Next you need to convert the certificate and key to the PEM format. I do not know what caused it, but openssl library, by means of which we interact with the Apple Push Notification Service (apns) in php, much more willing to work with files of the PEM format (OS X Keychain exports objects in DER format). Openssl library is implemented in most of *nix-systems, at least in OS X it’s provided as standard. Open a terminal window and do the following.
openssl x509 -in aps_development.cer -inform der -out MyAppCert.pem
openssl pkcs12 -nocerts -out ApnsDevKey.pem -in KeyName.p12
Second command console will ask for a key phrase three times. The first time you need to enter the passphrase you entered when exporting the key (pass1). The second and third times – a new key phrase, which will generate a PEM key. Let’s call it pass2. If you make it the same as pass1 there is nothing criminal but I would recommend to make them different for security reason.
Next we need to merge those two files
cat MyAppCert.pem ApnsDevKey.pem > apns-dev.pem
so finally we get single apns-dev.pem file which we’ll use on server side.
By the way, we can make sure both certificate and private key working well right here. Type in console
openssl s_client -connect gateway.sandbox.push.apple.com:2195 -cert MyAppCert.pem -key ApnsDevKey.pem
If you’re testing production certificate then specify gateway.push.apple.com domain instead of gateway.sandbox.push.apple.com
If it’s all ok then console will display a lot of text.
Moving to the server. Copying apns-dev.pem and create following php script near it.
  function replace_unicode_escape_sequence($match) {
    return mb_convert_encoding(pack('H*', $match[1]), 'UTF-8', 'UCS-2BE');
  }

  function send_ios_push($message) {
     $sound = 'default';
     $development = true;

     $payload = array();
     $payload["aps"] = array('alert' => $message["body"], 'sound' => $sound);
     $payload = json_encode($payload);
     $payload = preg_replace_callback('/\\\\u([0-9a-f]{4})/i', 'replace_unicode_escape_sequence', $payload);

     $apns_url = NULL;
     $apns_cert = NULL;
     $apns_port = 2195;

     if($development) {
        $apns_url = 'gateway.sandbox.push.apple.com';
        $apns_cert = 'apns-dev.pem';
     } else {
        $apns_url = 'gateway.push.apple.com';
        $apns_cert = 'apns-dev-prod.pem';
     }

     if (file_exists($apns_cert))
       echo("cert file exists\n");
     else
       echo("cert file not exists\n");;
     $success = 0;
     $stream_context = stream_context_create();
     stream_context_set_option($stream_context, 'ssl', 'local_cert', $apns_cert);
     stream_context_set_option($stream_context, 'ssl', 'passphrase', 'pass2');

     $apns = stream_socket_client('ssl://' . $apns_url . ':' . $apns_port, $error, $error_string, 2, STREAM_CLIENT_CONNECT, $stream_context);

     $device_tokens =array(
        "ae7c44342eceef645f3baf9f7e1eb2daf383f9341535c8dd5ef7276a29068e8d",
        "8d509c28896865f8640f328f30f15721ed40e41593e40a51e77b91c5b6db17d6"
     );

     foreach($device_tokens as $device) {
       $apns_message = chr(0) . chr(0) . chr(32) . pack('H*', str_replace(' ', '', $devices)) . chr(0) . chr(strlen($payload)) . $payload;
       if (fwrite($apns, $apns_message)) {
         $success++;
         echo("sent\n");
       } else {
         echo("failed \n");
       }
     }
     echo("fetch done\n");
     socket_close($apns);
     fclose($apns);
     return $success;
  }

  send_ios_push('Hello world');
This script do Push message delivery.
It’s important to know here
stream_context_set_option($stream_context, ‘ssl’, ‘passphrase’, ‘pass2’);
you need to specify pass2 phrase here. Otherwise openssl will ask to type passphrase each time manually.
$payload = preg_replace_callback(‘/\\\\u([0-9a-f]{4})/i’,
‘replace_unicode_escape_sequence’, $payload);
this is done in order to increase the actual length of the message. Since php function json_encode converts all non-ASCII characters to unicode equivalents (up to 6 bytes per symbol), which reduces the maximum length of not too large Push-messages (256 characters).
If it’s all ok, then you need to do all the same for Production Certiticate.
Несколько замечаний:
1) По отправке уведомлений из php, вы не делаете проверку на ошибки. У Apple есть расширенный протокол, который возвращает код в случае возникновения ошибки. Чем это плохо? Допустим у вас в базе есть токены устройств, и один из них не валидный. При отправке на такое устройство соединение будет закрыто без предупреждения. А вы в цикле продолжаете слать на остальные устройства. Получается, что вы шлете уведомления которые на часть устройств не дойдут и вы не узнаете в какой момент соединение было закрыто. Так же вы не узнаете причину
2) Отправка уведомлений из php приемлема только если сообщение отправляется на небольшое кол-во устройств. При отправке скажем на 2000 устройств возникают проблемы, например скрипт сваливается по таймауту. Для таких целей лучше использовать отдельный процесс/демон который из базы берет подготовленные сообщения и шлет их. Я для таки целей имею демона написанного на Си. Сообщения формируются и сохраняются в БД из веб приложения, а демон их рассылает. Для рассылки использую сишную либу libcapn (libcapn.org). Кстати над либой есть враппер – нативный php модуль apn (http://pecl.php.net/package/apn), но его я не юзал :)
@Serjo:
Спасибо большущее за комментарий, он реально полезную информацию несет. Особенно важен для меня лично первый пункт, я думал об этом, и даже где-то слышал, что за постоянные попытки рассылки на дохлые токены Apple может забанить аккаунт. Также слышал, что APNS API позволяет получить список активных токенов, который можно использовать, чтоб актуализировать список на своем сервер-сайде. Хотя в архитектуре, которую я использую для APNS список токенов должен быть всегда актуальным, потому что регулируется клиентским приложением: как только клиент узнает, что apns-токен сменился, приложение отправляет на свой сервер запрос обновления токена. Также предусмотрен запрос отключения push для конкретного девайса – этот момент в приложении также легко отлавливается, главное, проверять токен на живучесть в методах AppDelegate на всяких событиях типа applicationWillEnterForeground.
По поводу второго пункта вашего ответа – на 100% согласен, и тоже практикую всегда данный подход. В бэкенде раздел рассылки push действует таким образом, что сообщения могут находиться в нескольких состояниях: draft, pending_transfer, transferring, failed, dilivered, deleted. Только демон у меня конечно не такой крутой, как у вас, все на том же php, запускается по крону раз в 2 минуты (минимальный квант крона). То есть цикл отправки следующий: черновик – готов к отправке (ждем своей участи по расписанию) – отправка (запустился крон и пометил сообщение, как отправляющееся) – отправлено/не отправлено.
Я использую, как вы заметили, php-враппер для openSSL.
Был бы очень признателен, если б вы может дали какую идею, как можно обрабатывать ошибки в данном случае? Мне видится, что нужно читать ответный поток, анализировать контент – сдается мне, там приезжает старый добрый xml. В нем, вероятно, можно найти код ошибки и отреагировать соответствующе.
Великолепно, это то что нужно! спасибо Вам!!
Спасибо за статью. Такой вопрос. Все работает, но только в sandbox’е, а в продакшене ни в какую. Что уже только не перепробовал. В том числе на AdHoc сборке и сборке через TestFlight. Продакшн сертификат подготовил в точности также, как и в варианте с сэндбоксом. Никаких ошибок в ответ не получаю. Причем в тесте через Amazon SNS в продакшене все работает, но в собственной реализации тишина… Не хочется использовать сторонние сервисы. Есть ли возможность как-то получить ответ ошибки от Apple-сервера? Вроде слышал, что есть вариант с расширенным форматом payload, но не нашел подробностей.
Снимаю свой предыдущий вопрос. Пересоздал по новой сертификаты и проблема исчезла.
А можно изначально браться сразу за сертификат? Читал статью на стеке – говорят, что можно просто выбрать сертификат (вместе с закрытым ключом, то есть выбираем два объекта), создаем из них р12 файл, а потом в терминале с помощью одной строки
openssl pkcs12 -in FILENAME.p12 -out FILENAME.pem -nodes
делаем нужный нам pem. Все остальное как и у вас, но вроде должно работать.
не очень понимаю вашу мысль. сертификат ведь генерируется на стороне Apple. вы генерируете у себя запрос на генерацию сертификата, который содержит в себе публичный ключ. для отправки этого запроса вы должны быть зарегистрированы как девелопер, плюс у вас уже должно быть создано приложение (AppId), к которому привязывается push-сертификат.
У меня есть одна задача. Подскажите пожалуйста, реализуема ли она впринципе?
мне нужно не отправлять пуши, а принимать
то есть: на мой ios или android девайс приходят пуши, с информацией о типе операции, и сумме операции.
и мне нужно эту информацию передать http-запросом на определенный url.
Если у вас есть свободное iOS устройство для этих целей, то не вижу решительно никаких проблем. Что у вас вызывает сложность в этом вопросе?